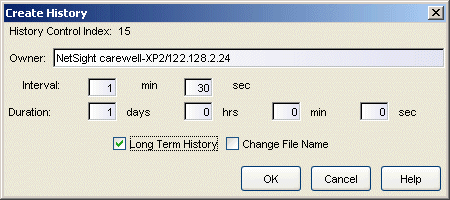
Use this window to create your own RMON history tables or modify the parameters of existing history tables. Creating your own tables allows you to view statistical information collected at intervals other than those of the default tables (30 seconds and 30 minutes).
To modify an existing table, select the desired history table entry in the RMON History List window, and click Modify. To create a new table, click Create in the RMON History List window. The Create/Modify History window opens.
Click the graphic for more information.

- Owner
- The owner, or originator, of the request to create the history table. Any request initiated by the RMON agent (i.e., the default host tables) shows its owner as monitor.
- Interval
- Enter or modify the time interval between data collections. The time interval cannot exceed 60 minutes.
- Duration
- Enter or modify the maximum range of time covered by the table. This time value defines the maximum number of entries that will be kept in the table before the oldest samples begin to be replaced by the newest ones. For example, a duration of one hour with an interval of 30 seconds would result in 120 entries.
- Long Term History
- Use this checkbox to specify whether you want the history table data saved to a long term history .csv file. By default, long term history .csv files are stored in the <install directory>\jboss\server\default\deploy\NetSight\WebMonitor\Rmon directory with a default name comprised of the device IP number, the port interface, and the history index number.
- Change File Name
- If this checkbox is selected, when you click OK, a file browser window opens where you can specify a file name and select a directory where the .csv file will be stored.
For information on related windows: