Create/Modify Alarm Window
The Create Alarm and Modify Alarm windows both provide the same set of parameters to let you define alarms. The Create Alarm window is opened with default settings and allow creating new alarms. The Modify Alarm window opens showing the settings for an alarm selected in the Alarm Watch table and allows you to edit an existing alarm.
Click areas in the window for more information.

- Owner
-
- Alarm Variable
- The MIB Object Selector panel on the right side of the window contains three tabs. The Tree and List tabs let you select an Alarm Variable for the alarm that you are configuring. The Description tab shows the text description for MIB objects selected from the MIB Tree or List tab.
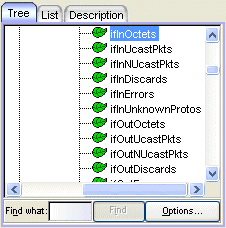
- Tree Tab
- This tab shows the supported MIBs as a tree hierarchy. You can expand the tree to select a MIB object that you want to watch with this alarm. Once an object is selected from the tree, you can set the remaining parameters to define an instance and establish thresholds for this alarm.
Sample Tree Tab
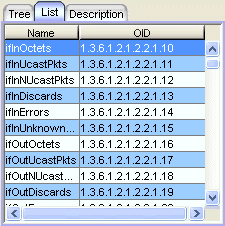
- List Tab
- This tab presents MIB objects in a table. A table right-click menu provides find and filter features to help you locate specific MIB objects. You can access
these Table Tools through a right mouse click on a column heading or anywhere in
the table body. For more information, see
Table Tools.
Sample List Tab
- Alarm Instance
- RMON objects that are part of a table are instanced by the index number that typically corresponds to an interface. For example, if you wish to set an alarm on an object located in an RMON Statistics table, you can determine the appropriate instance by noting the index number assigned to the table that is collecting data on the interface you're interested in. If there are multiple default tables per interface, however, or if additional tables have been created, this may not be true. (Table index numbers are assigned automatically as table entries are created. No two tables — even those on different interfaces — will share the same table index number.)
If you have selected an object from a table which is indexed by some other means — for example, by ring number — you must be sure to assign the instance accordingly. If you're not sure how a tabular object is instanced, you can use the MIBTool utility to query the object; all available instances for the object will be displayed. If you have selected an object which is not part of a table, you must assign an instance value of 0.
NOTE: If you wish to set an alarm on an object whose instance is non-integral — for example, a Host Table object indexed by MAC address — or on an object with multiple indices, like a Matrix Table entry (which is indexed by a pair of MAC addresses), you must follow certain special procedures for defining the instance. For these OIDs, the instance definition must take the following format: table index.length(in bytes).instance(in decimal format)
For the first byte of the instance, you must use the index number of the table which contains the OID you want to track. For example, to set an alarm on an object in the Host Table, define the first byte of the instance as the index number assigned to the specific Host Table you want to check. These index numbers are assigned automatically as the table entries are created. No two tables — even if they are on different interfaces — will share the same table index number.
Second, you must specify the length, in bytes, of the index you will be using. Again, in the case of an object in the Host Table, that value would be 6, since Host Table entries are indexed by MAC address — a six-byte value.
Finally, you must specify the index itself, in decimal format. In the case of a MAC address, that means you must convert the standard hexadecimal format to decimal format. To do this, simply multiply the first digit of the two-digit hex number by 16, then add the value of the second digit. (For hex values represented by alphabetical characters, remember that a=10, b=11, c=12, d=13, e=14, and f=15.) A hex value of b7, for instance, is represented in decimal format as 16 x 11 + 7, or 183. So, for example, the instance for an object in the Hosts group might read as follows:
2.6.0.0.29.170.35.201
where 2=the host table index; 6=the length in bytes of the index to follow; and 0.0.29.170.35.201=the decimal format for MAC address 00-00-1d-aa-23-c9.
For objects with multiple indices — such as objects in a matrix table — you must add additional length and index information to the instance definition, as illustrated below:
3.6.0.0.29.170.35.201.6.0.0.29.10.20.183
where 3=the matrix table index; 6=the length in bytes of the index to follow; 0.0.29.170.35.201=the decimal format for MAC address 00-00-1d-aa-23-c9; 6=the length in bytes of the next index; and 0.0.29.10.20.183=the decimal format for MAC address 00-00-1d-0a-14-b7.
Additional instance issues may exist for FDDI objects. If you’re unsure how to assign an instance, use the MIBTree utility to query the object of interest, and note the appropriate instancing on the returned values.
- Alarm Interval
- The amount of time over which the selected variable will be sampled. At the end of the interval, the sample value will be compared to both the rising and falling thresholds. There is no practical limit to the size of the interval (as the maximum value is 24,855 days 3 hours 14 minutes and 7 seconds — over 68 years!). The default value is 1 minute.
- Startup Alarm
- Since the first sample taken can be misleading. The Startup Alarm box to lets you disable either the rising or the falling threshold for that sample only. If you want to exclude the falling alarm, select the Rising option. The first sample taken will only generate a rising alarm, even if the sample value is at or below the falling threshold. To exclude the rising alarm, select the Falling option. The first sample will then only generate a falling alarm, even if the sample value is at or above the rising threshold. If you wish to receive both alarms as appropriate, select the Both option.
- Sample Type
- The Sample Type indicates whether you want your threshold values compared to the total count for the selected variable (Absolute), or to the difference between the count at the end of the current interval and the count at the end of the previous interval (Delta). Make sure you have set your thresholds accordingly.
- Rising and Falling Thresholds
- Rising and falling thresholds are intended to be used in pairs, and can be used to provide notification of spikes or drops in a monitored value — either of which can indicate a network problem. To make the best use of this powerful feature, however, pairs of thresholds should not be set too far apart, or the alarm notification process may be defeated: a built-in hysteresis function designed to limit the generation of events specifies that, once a configured threshold is met or crossed in one direction, no additional events will be generated until the opposite threshold is met or crossed. Therefore, if your threshold pair spans a wide range of values, and network performance is unstable around either threshold, you will only receive one event in response to what may be several dramatic changes in value. To monitor both ends of a wide range of values, set up two pairs of thresholds: one set at the top end of the range, and one at the bottom. Figure 4-8 illustrates such a configuration.
For information on related windows:
![]()