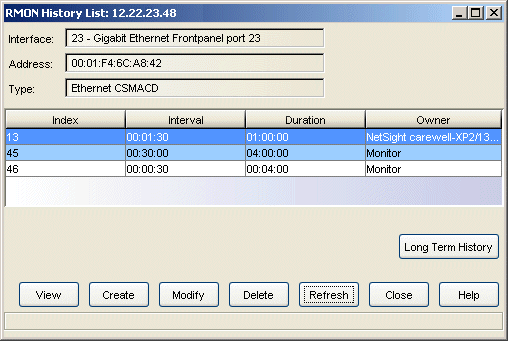
Use this window to view a list of RMON history tables for a selected port (interface). History tables collect snapshots of network statistics taken at user-defined intervals. On Extreme and Enterasys devices, each interface has two default history tables. One table contains snapshots taken every 30 minutes, and the other contains snapshots taken every 30 seconds. You can use the RMON History window to view each table of statistics in numerical or graphical format.
| NOTE: | When the RMON History List window is initially opened, the Console Event log might show several SNMP gets/sets to the selected device. This is because Console first queries RMON status on the selected device and, if it finds that RMON is disabled, Console attempts to enable it. |
|---|
Console provides table options and tools that let you customize table settings and find, filter, sort, print, and export information in a table. You can access these Table Tools through a right mouse click on a column heading or anywhere in the table body. For more information, see Table Tools.
To access the RMON History List window from Device Manager, click on the desired port in the Device View and select RMON History List from the port menu. To access this window from Console, select the desired port in the Port View of the Properties tab or in a FlexView table, and use the right-click Port Tools menu option.
Click the fields for more information.

- Interval
- Displays the time interval applicable to each table sample. For the default tables, statistical data is collected either every 30 seconds or every 30 minutes.
- Duration
- Displays the maximum range of time covered by each table. This maximum range defines the number of table entries. For example, the durations assigned to the default tables ensure that each table will hold a maximum of 120 entries. Therefore, the oldest sample in the 30-second table will be one hour old, and the oldest sample in the 30-minute table will be 2 1/2 days old. Once the tables are full, the oldest sample is replaced with the newest.
- Owner
- Displays the owner, or originator, of the request to create the history table. Any request initiated by the RMON agent (i.e., the default host tables) shows its owner as monitor. For user-created tables, this field displays the owner text string entered during the create history process.
- Long Term History Button
- Opens the RMON Long Term History List window where you can view all the history tables that have been configured for long term monitoring.
- View Button
- Opens the RMON History window where you can view the selected history table.
- Create Button
- Opens the Create History window where you can create a new RMON history table.
- Modify Button
- Opens the Modify History window where you can modify the parameters of the selected RMON history table.
- Delete Button
- Select a history table, and click Delete to remove the table from the list.
When any history table is deleted, the index numbers of the remaining
tables remain the same and the list is no longer sequential. If you deleted
table index 3, the table list would read 1, 2, 4, 5,...etc. Missing index
numbers are automatically re-used when new tables are created.
CAUTION: It is recommended that you do not delete a table of which you are not the owner. To restore deleted default tables, either recreate them or reset the device to restore all firmware defaults. Resetting the device, however, deletes any new tables that have been created.
- Refresh Button
- Displays updated history list information. The history list is automatically refreshed each time you create, modify, or delete an entry.
For information on related windows: