Use the Capacity Planning tool to generate a report on your network chassis slot utilization. The Used/Unused Slots report provides valuable information to help you plan your network needs. For example, if you are adding a new department with 30 new employees, you can use this report to locate unused chassis slots where you can add modules to expand your port capacity. You can view slot information for each individual chassis, or organized by chassis type. In most cases, the Used/Unused Slots report would be based on current data from your devices. However, there is the option to collect historical data if you would like to view a snapshot of your network's slot usage at an earlier time.
Report results can be exported as an HTML file or as a delimited text file. In addition, Capacity Planning reports can be saved to use again at a later time, and they can also be scheduled to run at specified intervals with report results sent out via a notification e-mail.
Flow
The flow chart below shows the sequence of windows that you will encounter when you create a Used/Unused Slots report using the Capacity Planning tool. As you progress through the steps of creating a report, the tool's left panel shows you a summary of your selections. You can click on the bold headings in this panel to navigate backward or forward between steps allowing you to change your report parameters. The summary information associated with each step appears in plain typeface beneath each step heading.
Click on blocks in the flow chart for more information about a specific window.

Select Report Window
Use this window to select either a report template or a saved report as your report type. Report templates are based on common network capacity planning questions. After you have created a report using one of the templates, you can save it (as a Saved Report) to use again at a later time. To create your Used/Unused Slots report, select the "How many used/unused slots do I have" report template.
Click the graphic for more information.
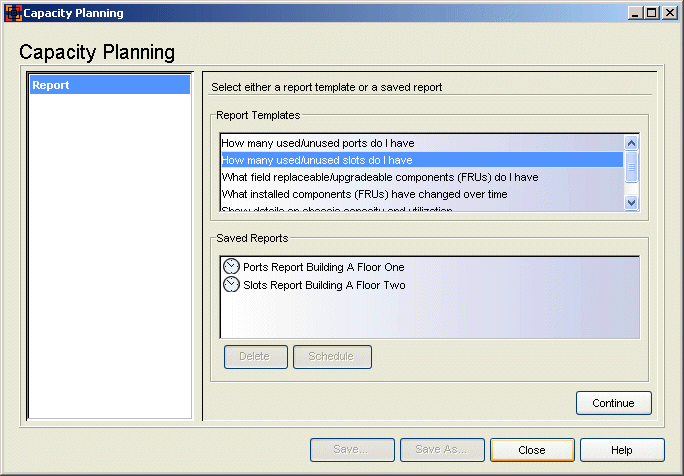
- Report Templates
- Lists the available report templates. Each report template is designed to answer a specific capacity planning question.
- Saved Reports
- Lists all your saved reports including reports saved by other Inventory
Manager clients connected to the server. After you have created a report using a template, you can save it as a
Saved Report, by clicking the Save button. This allows you to save
specific report attributes and parameters, so that you can regenerate the
same report at a later time. The schedule icon
 indicates that a saved report has
been scheduled. You can remove a schedule from a saved report by
right-clicking on the report and selecting Delete > Schedule.
- Schedule Button
- When you have selected a saved report in the Saved Reports list, this button opens the Schedule Report window where you can configure scheduling information and notification settings for the report.
Select Targets Window
Use this window to select the target devices for your report and add filters to further refine the list of devices, if desired. For example, you could target the Chassis device group, but filter out a single chassis you don't want included in the report. Or, you could target the Chassis device group, and filter in just one specific chassis type. Once you have made your selections, you can view a list of the devices you have targeted for your report to verify that your targets are correct.
| NOTE: | The slot usage report is generated based on data from individual devices.
Basically, the report asks each device, "What chassis and slot are you in?" If
the device responds with chassis and slot information, it is included in the
report. This can affect the validity of your report results if you are
generating a report using historical data (from device archives) as opposed to
current data from the device. (See the Specify Time Window for more
information.)
Let's say you want to know what your Chassis One slot usage was as of October 10, 2003. At that time, Chassis One contained devices 1.1.1.1 and 2.2.2.2. But currently, Chassis One contains devices 1.1.1.1 and 3.3.3.3. If you target Chassis One, the report would look at archives of 1.1.1.1 and 3.3.3.3, and no report data would be generated for 2.2.2.2. To achieve more accurate report results, you could target the All Devices
folder. Then, the report would look at archives of all three devices, and would
correctly report slot usage for 1.1.1.1 and 2.2.2.2. |
|---|
Click the graphic for more information.
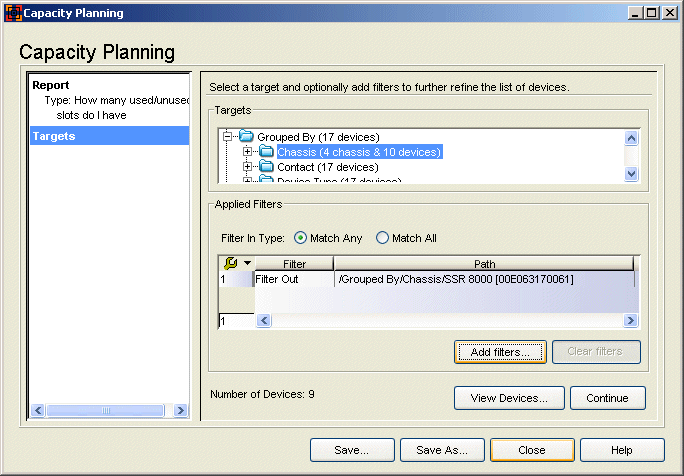
- Targets
- This panel displays your Network Elements tree. Expand the tree to select the target device group or individual device for your report. In most cases, you will want to target a group of chassis for this report. Devices that do not reside in a chassis will not generate any report results. If a device has been configured with SNMP context, you can select each context as a separate target device.
- Applied Filters
- Lists any filters applied to your selected targets. Click the Add Filters button to open the Add Filters window and create your filters.
- Filter In Type
- If you have defined one or more "Filter In" filters, select how you want
the filters to work:
- Match Any - A device can match any of the filter-in filters to be included as a target. For example, if you have selected the Grouped By device group and you filter in the 6C105 device group and the 6C107 device group, any device that is in the 6C105 or 6C107 device group will be included as a target.
- Match All - A device must match all of the filter-in filters to be included as a target. For example, if you have targeted the Grouped By device group and you filter in the Floor One device group and the Chassis device group, any device that is on Floor One and in the Chassis device group will be included as a target.
- Number of Devices
- A running total of the number of target devices with filters applied. Click View Devices to view a list of the target devices.
- Add Filters Button
- Opens the Add Filters window, where you can create filters to further qualify the list of devices for your report.
- View Devices Button
- Opens the View Devices window where you can see a list of the selected devices that will be included in your report.
Specify Time Window
Use this window to select a date from which report data will be gathered. In most cases, you will want to generate the report using current data from your devices. However, you can also generate a report based on historical data. In that case, the report will be generated using device data saved in the last archive preceding the specified date. Only archive operations that are configured to archive capacity planning data will be used (see How to Archive for more information.)
Click the graphic for more information.
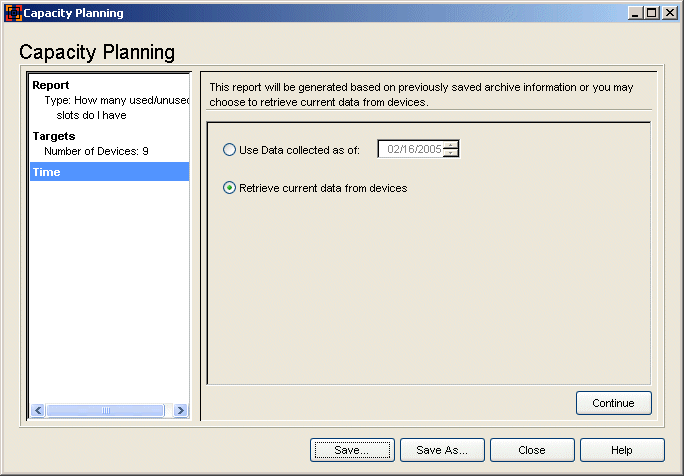
- Use data collected as of
- Report data will be collected based on the date selected here.
Calculations are based on the last archive preceding the
specified date. Only archive operations that are configured to archive
capacity planning data will be used. If there is no archive for a target device,
that device will not be represented in the report results.
If you use this option, be aware that your target selection could affect the validity of your report results. For more information, see the Note in the Target window section of this Help topic.
- Retrieve current data from devices
- The report will use current data from the target devices. Because this requires the report to gather current data from the devices, extra time may be needed when results are calculated.
Slot Results Window
Use this window to view the report data. The radio buttons at the top of the right panel let you select various ways to display the report results:
- Show Data by Chassis Type -- displays the report results organized by totals based on chassis type.
- Show Data by Chassis -- lists the report results for each chassis.
In addition, your selection in the tree determines the results displayed in the table. For example, you can select a chassis group and view report data for that group. Then, you can expand the group and view data for a specific chassis. As you change your selection in the tree, the table is updated with the results for your specific selection.
Slot Results - Show Data by Chassis Type
The Show Data by Chassis Type view gives you the flexibility of viewing your slot results summarized by chassis type or detailed by chassis. It provides an easy way to view top-level slot information and quickly determine where to take a closer look. Simply by changing your selection in the tree, you can view slot data for all the chassis of a certain type, or slot data for an individual chassis.
Click the graphic for more information.
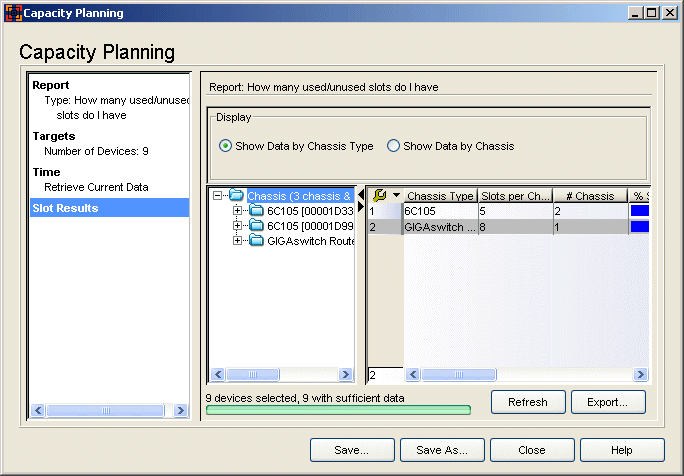
- Target Device Tree
- Displays your target groups and devices. Your selection in the tree determines what results data will be displayed in the table. For example, select a chassis group to see results summarized by chassis type, or select an individual chassis to see results for just that chassis. When you change your selection in the tree, the table is updated with the relevant information. If you select an individual device in the target device tree, the information displayed pertains to the chassis the device resides in.
- Device Count, Sufficient Data
- The total number of target devices, followed by the number of devices with sufficient data to report results. If you generated the report using historical data, a device is counted as having sufficient data if there is one archive used to obtain report results. Target devices that do not reside in chassis will be counted as having insufficient data.
Table
The Show Data by Chassis Type table displays slot data for the selected chassis group or individual chassis, organized according to chassis type. In most cases, your report will be generated using current data. However, if you generated your report based on historical data, the report will use device data saved in the last archive preceding the specified date. If there is no archive for a target device, or the device does not reside in a chassis, that device will not be represented in the report results.
| NOTE: | Devices that do not return information for certain report requests will display "Unsupported" in the results table entry. If a chassis displays "Not Mapped" in its results table entry, it indicates that the device type is not in the Capacity Planning data file. If you encounter the "Not Mapped" entry, please contact Extreme Networks Support for an updated data file for these devices. |
|---|
Slot Results - Show Data by Chassis
The Show Data by Chassis view lets you view slot data for each individual chassis. Depending on your selection in the tree, you can see report results for all the chassis in a group, or for just one individual chassis.
Click the graphic for more information.
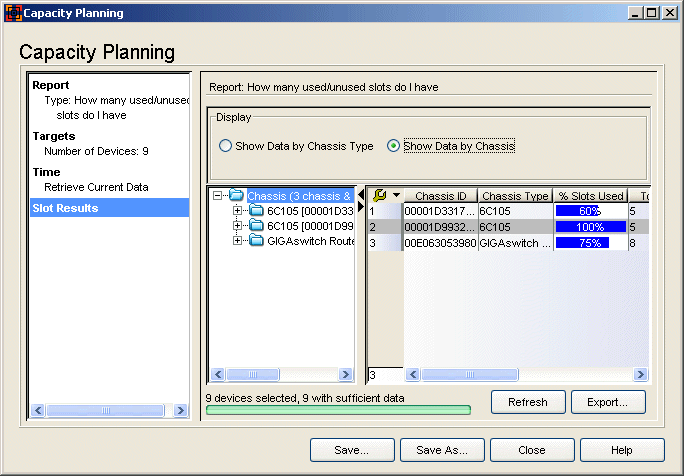
- Target Device Tree
- Displays your target groups and devices. Your selection in the tree determines what results data will be displayed in the table. For example, select a chassis group to see results for all the chassis in that group, or select an individual chassis to see results for just that chassis. When you change your selection in the tree, the table is updated with the relevant information. If you select an individual device in the target device tree, the information displayed pertains to the chassis the device resides in.
- Device Count, Sufficient Data
- The total number of target devices, followed by the number of devices with sufficient data to report results. If you generated the report using historical data, a device is counted as having sufficient data if there is one archive used to obtain report results. Target devices that do not reside in chassis will be counted as having insufficient data.
Table
The Show Data by Chassis table displays slot data for the selected chassis group or individual chassis. In most cases, your report will be generated using current data. However, if you generated your report based on historical data, the report will use device data saved in the last archive preceding the specified date. If there is no archive for a target device, or the device does not reside in a chassis, that device will not be represented in the report results.
| NOTE: | Devices that do not return information for certain report requests will display "Unsupported" in the results table entry. If a chassis displays "Not Mapped" in its results table entry, it indicates that the device type is not in the Capacity Planning data file. If you encounter the "Not Mapped" entry, please contact Extreme Networks Support for an updated data file for these devices. |
|---|
- Chassis ID
- The ID assigned to the chassis. This is usually a serial number or MAC address, depending on the chassis type.
- Abort/Refresh Button
- This button toggles between Abort and Refresh. While a report is being generated, Abort stops the report and clears all data out of the table. Refresh restarts report generation and updates the table with new data. If you have selected the Retrieve current data from devices option in the Specify Time window, clicking Refresh allows you to update your report results with the latest data from your devices.
- Export Button
- Allows you to export your report results table as an HTML file or as a delimited text file. A Save window opens where you can name your exported file, select the file extension, and navigate to a folder/directory where you want save the file.
- Save/Save As Button
- Opens the Save Report window where you can name a report and then save it so that you can run the report again. You can also select a checkbox to schedule the report. This opens the Schedule Report window where you can configure scheduling information and notification settings for the report. Once you have saved a report, it appears in the Saved Reports list in the Select Report window, where you can select it.
For information on related windows: